Search Me

Sunday, October 25, 2009


7 Bikes in The House Now

Yup... there are seven bikes in my house now... LOL.

Back in 2005, we had one bike in the family and the bike belonged to my son, Joel. Then in 2007, I decided to go MTB cross-country cycling and bought myself an el cheapo Exitway. Then I got interested in BikeTrials and bought myself two trial bikes, a 26" Echo Pure and a second-hand 20" Monty 221PR, all for a couple of thousand dollars.


And then Joe had a "kiddy" bike that had outgrown his sons' use and he asked me if I wanted it. I said sure and with that bike I taught Joel, Jordan and Jodene how to ride bikes... LOL.

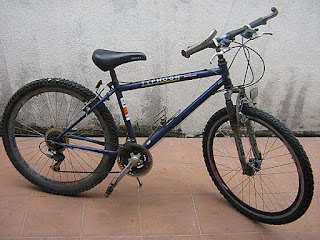
About a month back, I rented out my apartment to a very enterprising young man studying law. He had two bikes that were given to him by his other landlord. The bikes were VERY old and he heard me talking about cycling, thus he offered to give them to me.


The bikes were not in riding condition when I took them home. I managed to clean and get one of them working. I told Joel that he could have it, the Montana bike... LOL.

You should have seen how happy the nine year old were. He felt he was now riding an "adult" bike... LOL. Quickly, he called his younger brother, Jordan and told him that he could have the old bike... and likewise, Jordan told his younger sister, Jodene, that she can now have the "Uncle Joe" bike... LOL.

See how something that's old and considered junk by others, can have such a profound effect on other? (This gave me an idea for something I am currently planning to do but will only reveal later.)

The Lerun was in quite a sad shape. The rear tire had cracks and when I remove the tire, I noticed that the inner tube had melted and glued to the rim. I replaced the whole rear wheel with my old Exitway's spare wheel.

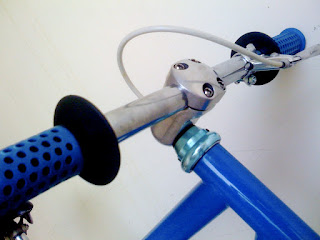
Then I tried to remove the front wheel from the Lerun. The quick release would not budge. I use some WD40 and still it would not budge. And so I decided to use the hammer on it and the following was the result.


I broke the quick release lever. Lucky for me, I still had the old Exitway's spare front wheel, but it was fitted with a disc brake. I tried installing the wheel on the Lerun anyway. But as you can see in the following photos... the disc was jammed up with the front absorbers!


I had some major problem removing the disc from the wheel. First the screw on the disc required a special screw-driver. Secondly, two screw's head were damaged and there were no way the screw driver's head could fit in. In the end, I took my old reliable hammer and whacked a flat head screw driver into the screw making a dent deep enough for me to unscrew the damn thing.


In the end, I managed to install the front wheel nicely onto the bike. Then I took it for a ride, that was when noticed that there was something wrong with the chain. Crap!


The chain was all badly rusted and could break anytime.


Since I did not have any spare chain at home, I decided to pack up the bike in my truck and took it to a bike shop in Bangi. Thirty minutes later, I was home with a pretty ride-able bike.


Finally, I got a bike for my wife to use. The hard part was to convince her to ride. After much much cajoling, yesterday evening, my wife and the whole family went cycling in our neighborhood.

Lets see if I can get everyone to go again tonight.


Installing a Rear Brake Booster on my Echo Pure

One of the first things I learned when I started BikeTrials was that braking was ultra important, especially the rear brakes. When I first bought the 26" Echo Pure trial bike, I discovered that when I used the rear brakes, the braking does not feel solid and tend to slip.

Then I tried grinding the rims, but still on more than a few occasions I fell over backwards a couple of times when I tried the rear wheel stand or pedal hops.

The reason the braking was not good was that the "seat stays" of the frame, where the brakes mounting were located (see bike parts illustration), will flex and expand each time the rim brakes were used. When the "seat stays" flex, the brakes will loose grip.

Since then I had been on a look out for a brake booster for my rear rim brakes. I tried looking in KL and Singapore and could not find any. Actually, I found some BMX brake boosters, but the fitting and screw holes did not fit. Some of my friends in Singapore told me that I could make my own. For a while, together with Sean, we were going to see if we could get some workshop to help fashion a brake booster of our own design... LOL

Anyway, when I rode with Wong Xu for the first time a couple of months back, I told him about my braking problem. Wong Xu told me that he had an old Echo Brake Booster he did not use any more and that I could have it. I offered to pay him for it but he insisted that I kept it... LOL.


The Echo brake booster.

Happily, I went home and tried installing the brake booster immediately... BUT... I found that I could not install the booster due to the rim brake bracket mounting getting in the way. Disappointed, I told Wong Xu the problem the next time we rode together.

Then he taught me a neat trick. He told me to get some old chain and dismantled them, then keep the chain rollers. The idea was to use the "rollers" as spacers so that the brake booster can be mounted above the bracket. Cool!


This photo shows the chain rollers that I needed.

The next challenge was to find the screws long enough and will fit exactly to hold everything together. The following photos shows the brake boosters installed on my bike.


Placing two rollers on each side, I managed to install the brake booster above the rim brakes mounting bracket. All in all, I used 4 chain rollers to do the job :-)


The brake booster after installation.


View of the brake booster from the top. This was the best I could do to align it properly.

After installing the brake booster, my Echo Pure felt and rode differently! I could feel the extra rigidness in the braking. Immediately, I felt more confident in the braking and have not look back since... LOL.


Tuesday, October 20, 2009


From a Mountain Bike to a Fixed-gear Bike

Sean Yeap has been talking about converting his old mountain bike into a fixed-gear bike for a while now. Two weeks ago, he got it done. Here are some photos of the bike. On a RM500 budget, he managed to put together this really cool looking bike. Salute!


I wonder how it will ride like. The last time I rode a fixed-gear bike was way back in 1970s. I remembered I borrowed someone dad's fixed gear bike and struggled with it... LOL.

What is a Fixed-gear Bike?

To put it very simply, it is a bike with pedals that will always move or rotate in the direction you are going... forward or backward. Depending on your preference, you can choose to install a brake or use the pedals or tires for braking. For a full history of fixed-gear bike, go here.

BikeTrials on a Fixed-gear Bike?

Here is a video of Chris Akrigg (a very famous biketrial rider, famous for his brake-less biketrials... :-) riding a Mongoose Maurice fixed-gear for the first time.


More information:


Wednesday, October 14, 2009


Replacing the Screw-pins on the Monty Platform Pedals

Recently, I decided to replace the screw-pins on the Monty platform pedals, which were pretty badly worn out. I took the pedals to a couple of bike shops and none of them sell the replacement screw-pins. Finally, one of them suggested I look for stainless steel screws that fit and use them as replacements. And that was exactly what I did...


The worn out screw-pins.


The 2.5cm stainless steel screws that I bought from a regular hardware shop as replacement screw-pins.


The pedal after I inserted all the stainless steel screws.


I took the pedals to a workshop and asked the workers there if they could help me saw off the screws at the length I needed.


The pedal after I installed it back on my bike.

The pedals worked great! I am getting the full grip that I needed, but now... I gotta be extra careful and make sure I wear the shin guards. A slip here could be weeks of pain... LOL.


Tuesday, October 6, 2009


Singapore 09 National BikeTrial Championship - Round 3

The Round 3 of the Singapore 2009 National BikeTrial Championship was held in Bukit Batok Town Park on Oct 4th. I was there to capture the event on photos and videos.

For this round, a couple of things stand out and affected the overall competition; the format and the sections layout.

The Format

There were a total of 7 sections with all riders required to ride two rounds. All the riders were to finish the same section before moving on to the next section together. The reason for this format was primarily due to the lack of qualified Observers to man all the sections at once.

From my point of view, it was great, as I could take photos and videos of the riders in sequence (ran out of disk space... LOL.). Crowd-wise, it was fantastic... spectators and riders gathered together to watch the riders take on the sections making it so exciting for everyone.

From the competitor's point of view, it was not so great. Riders lost momentum as they needed to wait for the other riders to finish first before moving on to the next section. Their competitiveness, pace and drive were mellowed and a bit too chilled... LOL.

Thus, it was not surprising that by about 3:00pm, the riders could only managed to reach Section 7. And so, due to a unanimous decision, the competition was concluded with only 1 round instead of 2. However, the Open category riders went for Round 2 as there were only 4 competitors in that category, and they were able to complete the round in less than 30 minutes.

The Section Setup and Layout

Out of the seven sections, only two were not setup on a slope. The rest were all setup and laid out at the slopes along the lake.

In my opinion, I think Section 5 was the toughest, especially the Elite's route. Upon entry, you will need to ride (or rather hop) up a steep slope. Then you will need to side hop a 5 foot high rock. Because of the slope, even "dapping" onto the rock was extremely difficult. Not surprisingly, none of the Elite riders could finish the section.


Check out the photos and videos of the competition:

Here are the results of the competition:

Elite Category
  1. Kaden Low (Monty 26")
  2. Ben Loh (Month 20")
  3. Matthew Tan (Rockman 20")
J. Senior Category
  1. Clement Ng (Monty 20")
  2. Chai Chin Cher (Monty 20")
  3. Gavin Ong (Monty 20")
Open Category
  1. Mohamed Bin Ali (Neon 26")
  2. Ben Leow (Koxx 20")
  3. Kelvin (CZAR 26")