Search Me

Showing posts with label Bike Repair. Show all posts

Monday, November 29, 2010


Yeah! Bought a New Magura HS33 Rear Rim Brake!!

Went down to Singapore on Nov 27 and bought myself a new set of Magura HS33 rear rim brakes! Paid SGD 160 for it. Based on the advise given, I went for a 4 fingers lever. Suppose to give a better a better braking and performance.

Came back to KL on the night of Nov 28 and installed the brake the very next evening... LOL.


The old Echo rear rim brakes.


The box of the Magura HS33 rear rim brakes.


The rim brake with a VERY long tube.


The HS33 rim brake now installed on the ECHO Pure.


The old ECHO rim brakes packed away nicely... Never to be seen again? LOL.


The four fingers lever. I found it much more easier to apply pressure as it was longer and provided more leverage.


The ECHO Pure proudly installed with the HS33!

So what is the conclusion? How's the new brake? All I can say is that the ECHO Pure feels like a BRAND NEW bike! The handling is completely different and inspired confidence!!!


Saturday, November 6, 2010


Trial Bike Maintenance

It had been quite a while since I took a good look at the condition of my 26" Echo Pure trial bike. I had noticed that the bolts were pretty rusted and some parts of the treads on the rear wheel tire were ripped off. I could see the tire's inner lining and reinforcement. Time for some major replacements.


The replaced rusted bolts just waiting to cause pain... LOL.


The new steel bolts on the front brake mounts. I changed all the bolts on both the front and rear brakes.


Replaced the stem's bolts as well. Wished I had some titanium bolts instead of the steel bolts... LOL.


Check out the tread on the rear tire. Ripped right off.


Another angle of the tire to show the ripped section.

While I was replacing all the bolts on the bike I noticed that one of the tube of the rear hydraulic brake was slightly dented.

I adjusted and twisted the tube and it sprung a leak. I tried readjusting the pressure of the hydraulic fluid at the brake lever, but made it worse. Lets just say I had hydraulic fluid all over the floor!


The screw on the brake lever to adjust the hydraulic pressure. Noticed that the screw had worn the gap in the lever. Sigh!


The hydraulic brake fluid leaking from the tube.

The next day, I took my bike to KSH bike shop in Taman Tun. Unfortunately, they were swarmed and could not help me out with the brakes. But they were kind enough to provide me with the tube and nozzle for topping up the hydraulic fluid (thanks guys!!). All I needed was the "injector" to connect to the tube.


The tube and nozzle given to me by KSH Taman Tun. Thanks guys! I will probably get to use it in future :-)

I was intended on heading home to try my hand at fixing and topping up the hydraulic fluids. But, somehow along the way, I side-tracked to Taman Megah and decided to stop at the Merida bike shop to get a new pair of tire. I ended up asking them to help top-up the hydraulic fluid. Took about 2 hours, but we managed to get it done.


Bleeding the hydraulic fluid at Merida bike shop.


Bleeding the brakes via the lever.


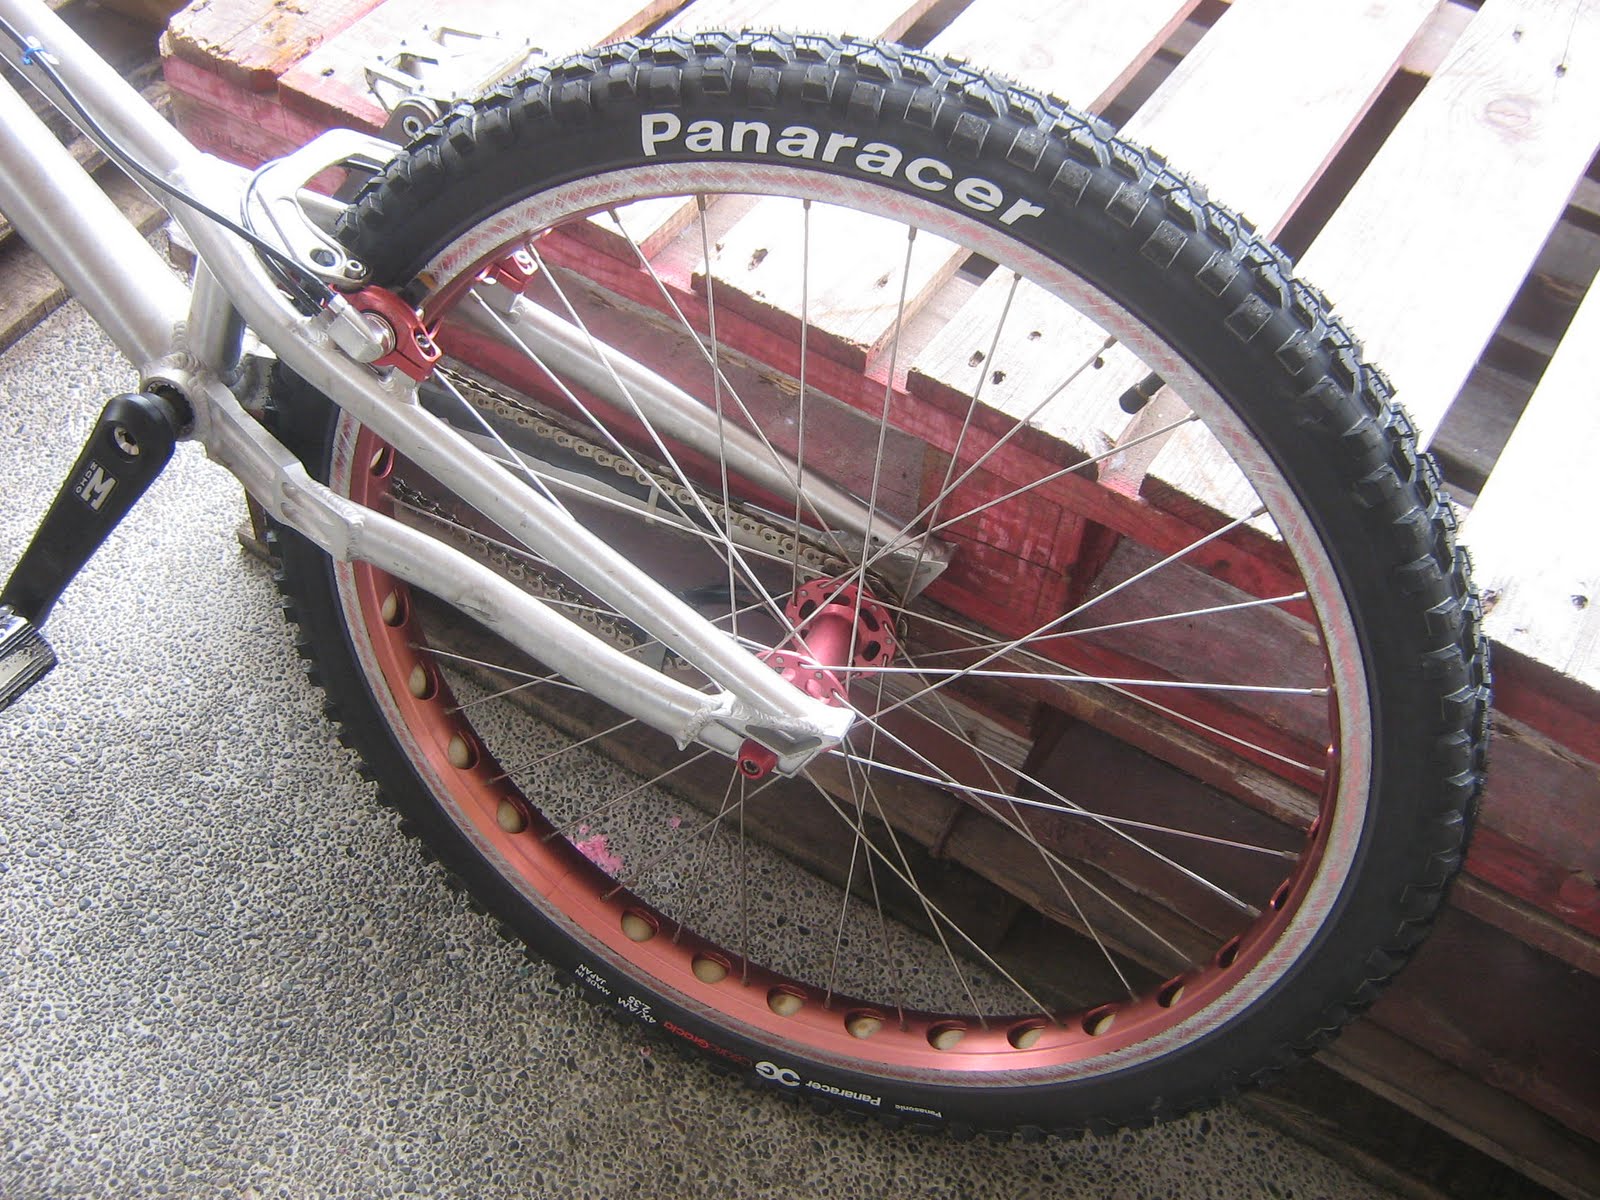
The new Panaracer tire that I bought.


The Panaracer tire in all its glory! I love the tire! Light and felt great to ride!

The brakes worked great. The tire felt good. But I felt that I still needed a new set of rear brakes. And so I texted Walton in Singapore and ordered a set of Magura HS33 rear rim brake.


Saturday, January 30, 2010


DIY V-brake Roller Chain Tensioner Completed! - Update

Here is an update on my November 2009 post on "DIY V-brake Roller Chain Tensioner Completed!". Basically, I have added a "cage" to the roller to ensure that the chain stays on. What I discovered while riding was that there is an enormous amount of pressure exerted on the roller chain and the tensioner's roller.

Whenever the wheel comes in contact with the wooden pallets or other surfaces, the chain gets shaken intensively. This causes the chain to come off the roller and slacked, which is a VERY dangerous situation.

And so, as added security, I attached a soft tin metal plate to wrap around the chain to ensure that the chain will not derail when under heavy pressure. See the following photos of the DIY roller cage.


Up to now, I have had zero incident, where the chain would come off the roller. Lets keep it that way eh? LOL. While I was taking photos of the roller cage to update this blog, I noticed that the nut (or spacer nut?) holding the gear cog in place was completely loose! Unbelievable!


I unscrewed the nut (or is it a spacer) to take a closer look at the gear cog. Believe me, I was thankful that I noticed this now instead of later. A disaster waiting to happen. I am definitely adding this to my safety checklist before riding any bike!


I removed the chain roller so that I could get at the gear cog.


With the chain out of the way, I could tighten the nut holding the gear cog in place.


I took out my "Bike Hand" bicycle tool set to look for a tool to tighten the nut.


Heck... none of the tool could be used... LOL.


In the end, this 20 years old spanner did the job!


Sunday, January 17, 2010


Video: How to Replace the Hydraulic Fluid with Water on the Magura HS33 Brakes

Finally, I managed to get the video done. Read what I wrote about "How to Replace the Hydraulic Fluid with Water on the Magura HS33 Brakes" in the previous post.


Sunday, January 3, 2010


How to Replace the Hydraulic Fluid with Water on the Magura HS33 Brakes

On the 2010 New Year eve, together with my son Joel, I went to Wong Xu's apartment in Puchong to get my Magura HS33 brakes' hydraulic fluid (mineral oil) replaced with water.

Wong Xu has been using water instead of mineral oil on his HS33 brakes for the longest time now. It seems water is a popular substitute for mineral oil for HS33 in China. But not all hydraulic brakes can use water instead of hydraulic fluids... this only works on the Magura HS33 brakes without any leakages... :-)


Wong Xu removing the HS33 brake lever from the handle.


The grip was stuck so tight that he had to use a chopper to cut open the grip... LOL.


After removing the whole set of brakes from the bike, he proceeded to remove the screws to drain out all the hydraulic fluid.


The hydraulic fluid, originally yellowish in colour, is now completely BLACK with dirt particles!


Using a washing basin, the complete brake set is submerged in soap water. Using the lever, the soap is sucked into the brake tubing and pumped out to cleaned the inside completely.


Joel watching and learning... LOL.


After rinsing the brakes thoroughly, water is pumped into the brakes and the opening screwed tightly to ensure no leakages.


The Magura HS33 brakes... now powered by H2O.


The exterior of the brakes are cleaned thoroughly to remove any dirt.


The HS33 installed back on the bike.

15 days later, I have to replace the water in the brakes again. This is to ensure that all the dirt and grit inside the brake system are flushed out thoroughly. After that the brakes can be used for the next 6 months on a daily basis without any problem... I hope... LOL.

I will post up the How-to videos after I have finished uploading to Youtube.


Thursday, December 17, 2009


New And Newer Bicycle Roller Chains

Finally managed to get some time to update my blog today. Been busy running all over the place at work and at home. The kids will be starting school again in a couple of weeks. Me and the wife have been shopping for new school uniforms, shoes, text and work books for the kids.

Anyway, just to follow up on my roller chain mishaps, I managed to buy a replacement roller chain on Nov 30th. It was actually harder than I thought looking for a single-speed chain. In the end, I settled for a BMX roller chain from a bike shop in Sungei Way in Petaling Jaya.


The new BMX roller chain from Taiwan.

After installing the new roller chain on my Echo 26", I tried riding round. The roller chain kept slipping off my DIY roller chain tensioner. It was very annoying and frustrating.


The new roller chain (right) compared to the old chain.

I adjusted and re-aligned the tensioner to no avail. I continued riding, realigning and adjusting the tensioner a couple more times and decided to stop when I heard a "clink" sound, like something came off and dropped from the bike. I could not believe my eyes when I saw a piece of the roller chain link plate lying on the floor... LOL. "You have got to be kidding me," I thought.


A photo showing the link plate that came off the pins when I pedal kicked.

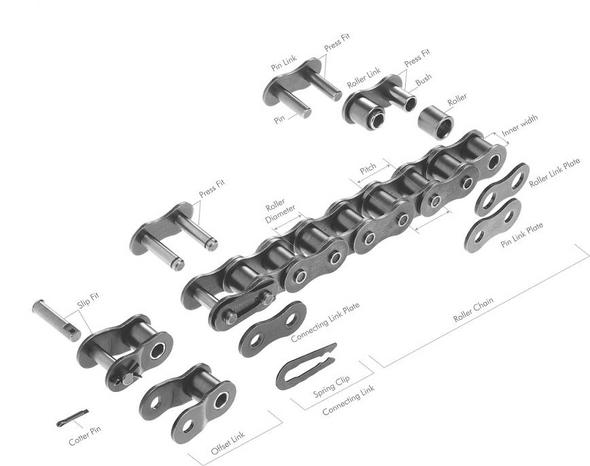
Apparently, the inner width between the link plates on the new roller chain were wider than the one that I had earlier, and that allowed one of the sprocket tooth to get caught in between the link plates, hence popping the link plate right off the roller chain! Scary!!!

Right after that I packed up everything and decided to call it a night. My plan was to go get a new roller chain the next day... LOL. And this time I was going to bring my old original roller chain with me for comparison.... LOL.

The next day and a couple of days later, I was just too busy with work to go looking for a new roller chain. It was only after a week later, on a Saturday (Dec 12th) that I decided to go to Kota Kemuning to look for Ah Chun of Tat Seng Bicycle Centre. I had decided to bring along my Monty 221PR to replace all the rear wheel spokes as well.

In my mind, I had thought that if anyone could help me with my bike problems, it would be Ah Chun... LOL. And sure enough, he recommended a set of roller chain that were suitable for BMX, Trials or Freestyle bikes!


The YBN roller chain.

That night, after I installed the new roller chain, everything came together perfectly! The chain was no longer coming off the tensioner sprocket and I could ride with confidence... but only after I had my eldest son, Joel, keeping an eye on the chain as I rode. I tried everything from hopping, pivoting, pedal kicking, etc. It worked great! Hahahaha. Confidence! Happiness!


Side view of the 3 roller chains, with the newest one at the bottom.


Top view of the 3 roller chains, with the newest one at the bottom. Notice the design? The bottom one is designed to be slip-proof!


The new roller chain installed on my Echo.


Closeup of the new roller chain on my Echo.

As for my Monty 221PR, I left it with Ah Chun and less than a week later, I got it back. Except for the brakes, the spokes were great! I had to re-tar the rims to maximise braking power... :-)

And now I have both bikes in good working conditions. From here on, I am back on training and riding... whoohu!


Monday, November 30, 2009


Roller Chain Snapped! Worse Nightmare Came True

After installing the V-brake chain tensioner that I DIY-ed last Thursday, I had been dying to ride my Echo!!! Unfortunately, I had to spend the weekend out of town in Johor Baru.

And so today, as soon as I had gotten back from work, I started my warm-up and practice routine on the 26". After about forty minutes, I decided to start on the pedal kick routine. That was when the roller chain snapped with a loud "crack". Freaked me out!!! One of the roller chain links broke. Thankfully, I managed to get the bike under control without any mishap!


The DIY V-brake chain tensioner. Still very solid and firm.


The broken roller chain. Check out those rust!

Ever since I had had that first experience with the roller chain snapping apart on me, I had been paranoid and wary of it happening again. And sure enough, it happened today.

When I was replacing the derailleur with my DIY chain tensioner, I was more or less aware that the roller chain was pretty rusted. In fact, after the first roller chain snapping apart experience, I had purchased a bottle of bicycle chain oil to lubricate the gears and roller chain. I had attributed the roller chain breaking to the derailleur. Now I think the rust probably played a big part.

It was very likely that I started maintaining the roller chain links way too late. Upon closer look today, certain parts of the chain links were pretty badly rusted.

So... what was the lesson learned? Constantly oil and maintain the roller chain to prevent rust from setting it!!!! Rust will weaken the metal!!! Guess I am going to shop for new bicycle roller chain tomorrow... gonna Google and see what are the best and lightest chain I can afford... LOL.

Btw, I regularly checked and maintained my pedals, brakes, wheels and stem. Mostly, I made sure that the nuts were tightened properly... :-) You should too!